
Tools:
Small Phillips Screwdriver
Sharp knife (scalpel would be ideal)
Scissors
Contact Adhesive (All purpose Bostik or similar)
Useful, but not required.
A small piece of Bluetack
A 100mm elastic band
Note: Due to supply issues Blue or Green Acrylic may have been supplied.
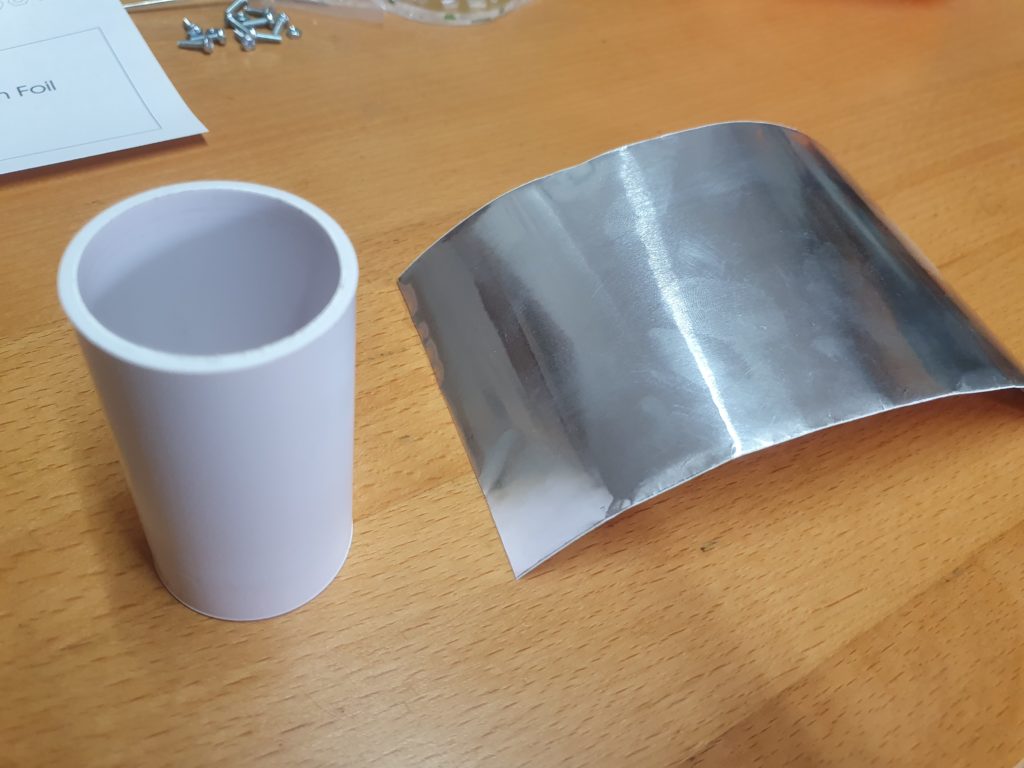
Take the PVC Tube and a sheet of foil

Cut the foil into 20mm wide strips

Remove the backing, and carefully apply the strips on the inside of the PVC tube. Don’t worry too much about any overhang.

Continue around the inside of the tube until it is all covered.

With a sharp knife cut off the foil to leave a 5mm gap from the end of the foil to the end of the PVC tube. Do this at both ends.

Using the contact adhesive stick the two end caps onto the tube (the smaller disc goes on the inside of the tube) Ensure they are as central to the tube as possible. Do this at both ends.

Prepare a sheet of foil by removing the plastic and place sticky side up on a flat surface.
Lay the Blue(or Green) and Red Acrylic onto the foil with the side engraved FOIL downwards onto the adhesive.
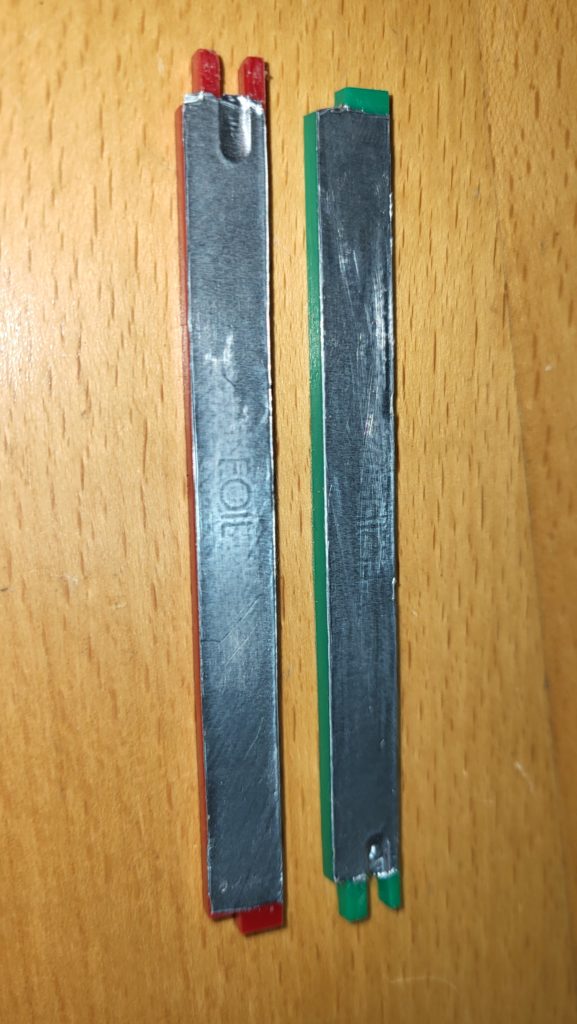
With a sharp knife cut out the acrylic from the foil, cutting as close to the acrylic as possible.
Remove the foul from the prong and prongs at each end of the acrylic.
These form the electrodes of the motor.

Place both the acrylic three legged pieces with the engraved FOIL side downwards, and carefully cut around the shapes with a sharp knife.
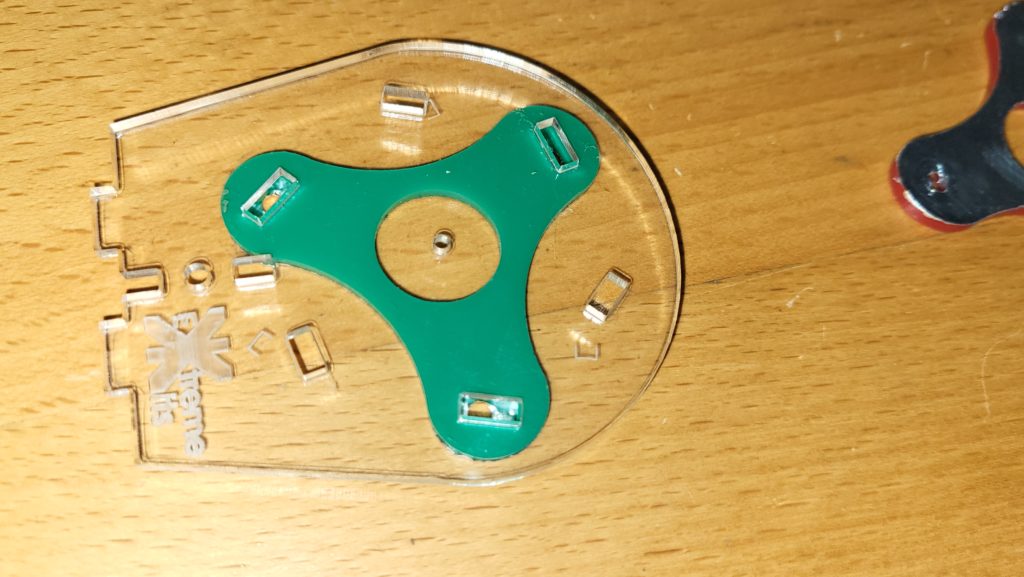
Lay an acrylic three legged piece onto a flat surface foil side down.
Place an end plate on top of the acrylic three legged piece, so that the Extreme Electronics logo reads backwards and so that the larger rectangular holes match up with the rectangular holes in the three legged piece.
If you can’t get the rectangles to match, use the other end plate.

Place one of the matching coloured electrodes prongs down into both the end plate and into the three legged piece. Ensure the foil is on the side facing the centre of the end plate.

Place the other matching matching coloured electrodes prongs down into both the end plate and into the three legged piece. Again ensure the foil is facing the centre of the end plate.
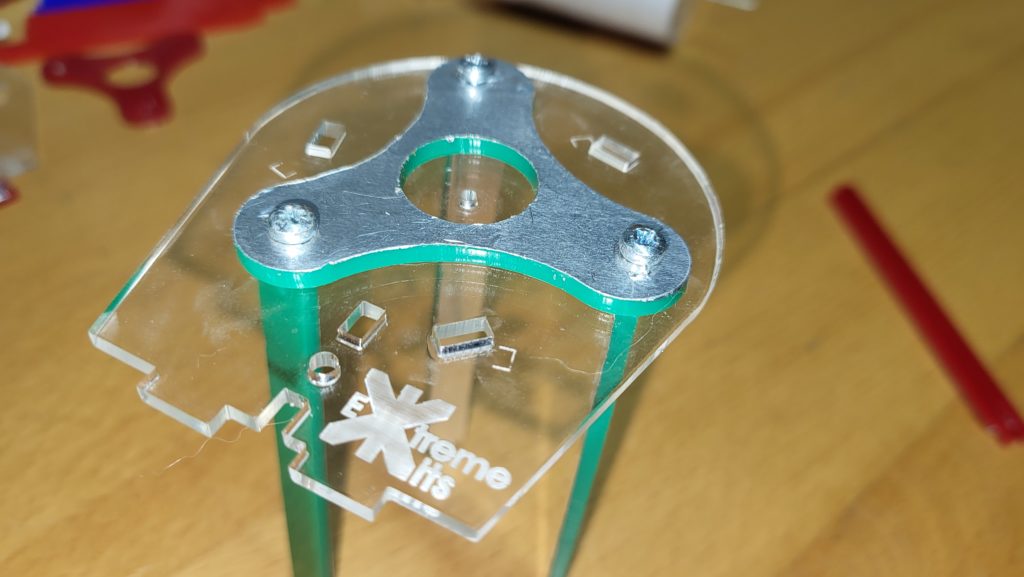
Carefully flip the assembly over and push in 3 10mm M3 Screws into the holes in the three legged piece and electrodes.
Put an m3 tag onto one screw to use as a connection point.
The screws do not need to be screwed in, they will held buy the foil and the acrylic.

Repeat the process with the electrodes and end pieces

and ‘Screw’ together in the same way.

When the Glue has thoroughly dried.
Take the PVC tube assembly and push the 2mm axel through the centre holes in both end plates.
Add a small spacer at each end of the tube.
In later kits, these have been replaced with a silver bead.
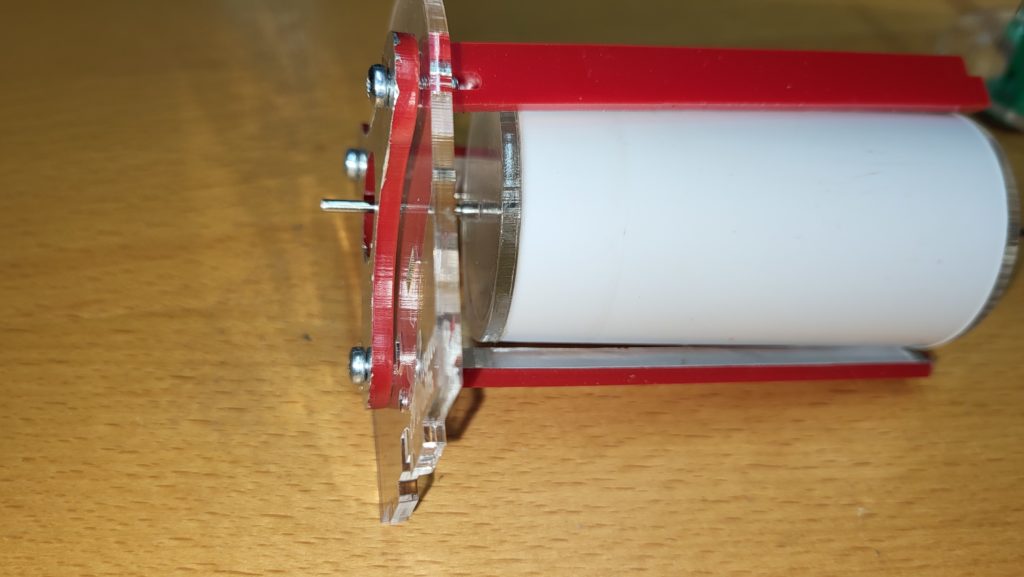
Push the PVC tube and 2mm axel through the hole in the centre of one end piece assembly.

Push the PVC tube and 2mm axel through the hole in the centre of the other end piece assembly, ensuring that both end piece assemblies are in the same orientation.

Carefully push each of the tabs of the electrodes into the holes at each end. You may find it useful to hold the assembly together with an elastic band whilst you are doing this.

Take the bottom strut and slot it into the holes in the end plates (again you may want to use the elastic band to hold things together. )

Secure the strut with 2 x 10mm m3 nuts and bolts. (It can be useful to use a small piece of blue-tack to hold the nuts in place whist screwing in the bolts.

Clip the bottom plate on to the strut, and secure with 2 x m3 nuts and bolts.
Stick on the feet to each corner of the bottom plate.

Your corona motor is complete.
