
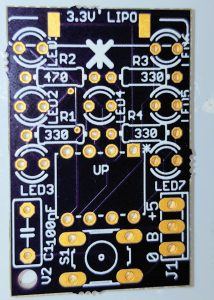
 Take the PCB and ensure it is clean of fingerprints. This is the side the components go on.
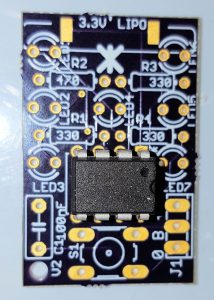 Put in the IC (black 8 legs) the little circular dot needs to be positioned nearest the square pad (top right of the IC with the board this way up). Check this orientation again, and if you are happy, solder in the IC, beign careful not to bridge any connections.
 Find the 4 resistors and bend the legs as shown. There are three 330 ohm resistors (Orange Orange Brown) and one 470 ohm (Yellow Purple Brown)
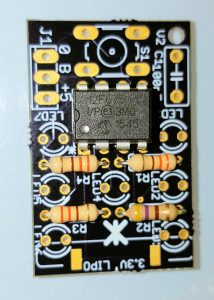 Place the 470 ohm (Yellow Purple Brown) in the resistor place holder labelled 470 (bottom right corner of this picture). Place the other 3 x 330 ohm (Orange Orange Brown) in the other resistor place holders labelled 330. When you are sure these are in the correct positions, solder them in place.
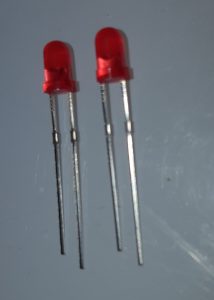 Find the 7 red LED’s These must be placed in the PCB the correct way around. The short leg is the Cathode and the long leg is the cathode. If you have really good eyesight you will see the LED is a “D” shape with the flat side being cathode.
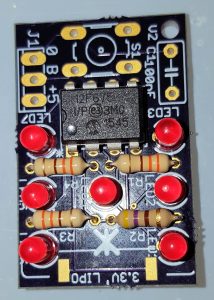 All of the LED’s need to be placed with the cathodes (short leg) to the left hand side of the board in the picture on the left.
 When you have placed and soldered all of the LED’s add in the 100nF capacitor.
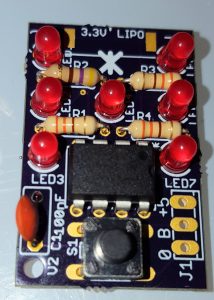 Then click the button into position and solder
 Find the battery holder and bend the legs of the holder as shown, It should fir over and under the PCB snugly with all three legs making contact with the pads on the PCB
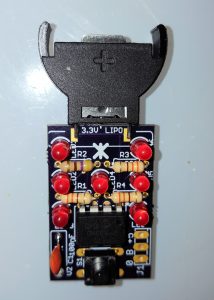 Check the position of the battery holder pins and solder to the three pads (two on top, one below)
 Place the battery into the holder making sure that +ve on the battery is uppermost (matching the + on the holder) . Push the battery home.
If all is OK press the button. The LED’s should run for a while, slow and stop showing a dice number. If you want to roll again, press the button. If you leave the dice for more than 15 seconds it will switch off automatically.
Enjoy your electronic dice.
If you would like a double dice, build another kit, but leave off the battery holder. Solder three wires from 0 B and +5 on your first board to the same three connections on the second. Now when you press the button both dice boards run together.
You can expand the dice boards this way as much as you like. You will find that the small battery is not enough for more than a couple of boards, but you can use a bigger battery. To achieve this, REMOVE THE BATTERY HOLDERS ON ALL OF THE BOARDS. Then connect 3 x 1.5V AA cells in series across the 0 and +5V of one daisy chained board. This way you should be able to run 10 or so dice boards at once from a single button press.
